Hand Washing Dishes Sanitization Guide
Table of Contents
Things You'll Learn From This Article:
- Hot water alone doesn’t kill germs when hand-washing dishes; it mainly helps loosen grease so soap can remove bacteria.
- Soap and scrubbing matter more than extreme heat because physically removing food and grime gets rid of most bacteria.
- Using separate steps—wash, rinse, then sanitize—prevents leftover soap from weakening sanitizers.
- Chemical sanitizers like diluted bleach work at safe temperatures, but only if mixed at the right strength and left on long enough.
- Guessing sanitizer amounts can fail or leave residue, so test strips are the only reliable way to get it right.
- Washing items in the right order (glasses first, pots last) keeps dirty water from spreading germs to cleaner dishes.
- Kitchen sponges spread bacteria easily and need frequent replacement or separation by task.
- Dish brushes dry faster than sponges, which makes them less likely to harbor bacteria.
- Air drying is safer than towel drying because towels quickly pick up and spread bacteria.
- Clean dish towels don’t stay clean for long, so they need frequent washing and replacement.
- Delicate glassware and china need gentler water, soap, and tools to avoid permanent damage.
- Plastic cutting boards can handle bleach solutions, but wooden boards need gentler methods like salt and lemon.
- Items used with raw meat should always be cleaned immediately and kept separate from other dishes.
- Cast iron can handle mild soap, but soaking and aggressive scrubbing can damage its protective seasoning.
- Drying cast iron right away and lightly oiling it prevents rust and keeps it usable.
- Hard water reduces soap and sanitizer effectiveness, which is why mineral buildup needs periodic removal with vinegar or similar acids.
- Letting food dry on dishes makes cleaning harder and increases the need for soaking and heavy scrubbing.
- Setting up everything before you start washing helps avoid recontamination and saves effort.
- Cleaning the sink before washing dishes keeps bacteria from spreading to freshly cleaned items.
- Washing your hands before and during dishwashing prevents you from spreading germs onto clean dishes.
- Faucet handles can recontaminate clean hands, so wiping them down before starting reduces risk.
- Soaking pans right after cooking makes baked-on food much easier to remove later.
- Grease sticks to plastic more than other materials, so hotter water and stronger soap help.
- Some stains, like lipstick on glassware, need special treatment before normal washing works.
- Filling basins instead of running water constantly saves water without reducing cleanliness.
- Extremely hot water uses more energy but doesn’t improve safety much beyond moderate heat.
- Countertops, towels, and storage habits affect how clean your dishes really stay after washing.
Washing dishes by hand carries more microbiological significance than most people realize. According to research from NSF International, the kitchen sponge ranks as the single germiest item in most American homes. Three of the top five bacterial hotspots are located in the kitchen. Understanding proper sanitization techniques transforms routine dishwashing from a casual chore into an effective defense against foodborne illness.
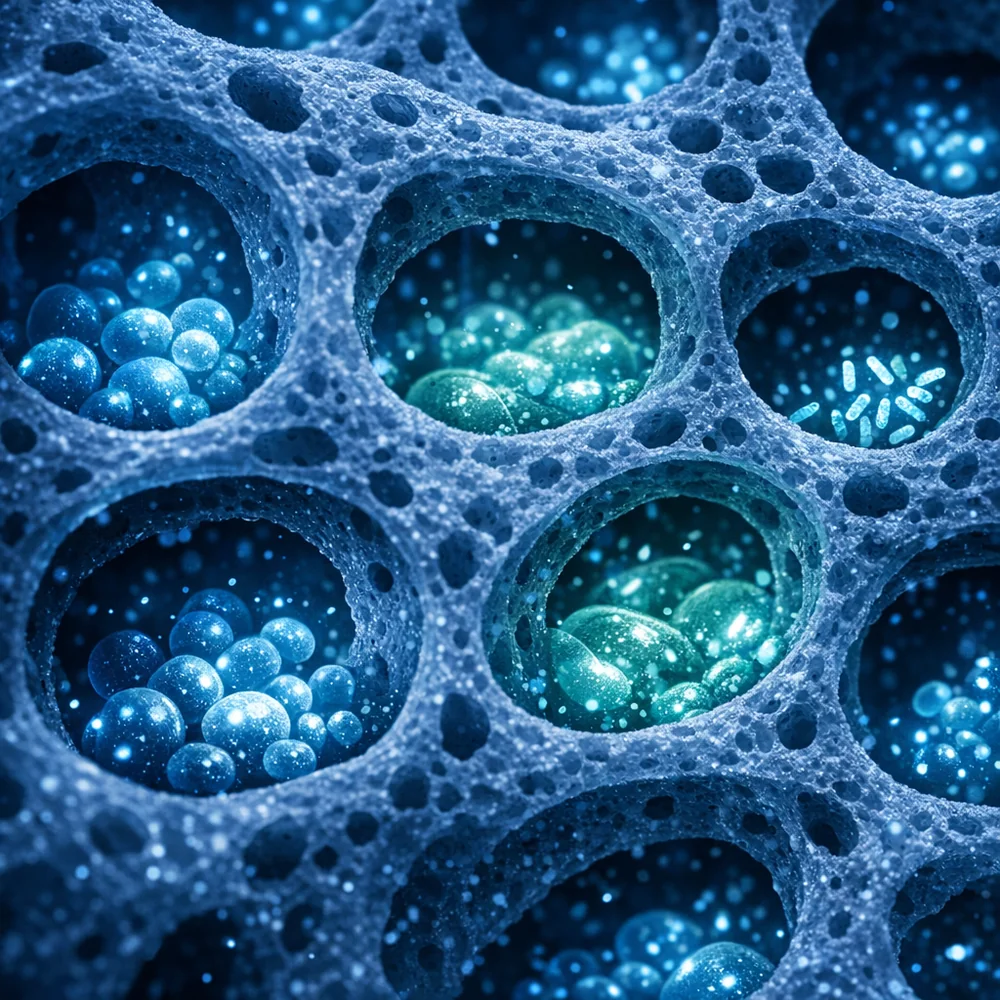
Bacteria like E. coli, Salmonella, and Staphylococcus aureus survive on kitchen surfaces and sponges for up to 16 days. A Duke University study revealed that kitchen sponges serve as more effective bacterial incubators than laboratory petri dishes, thanks to their complex porous structures that create diverse microenvironments for pathogen growth.
Water Temperature Reality Check
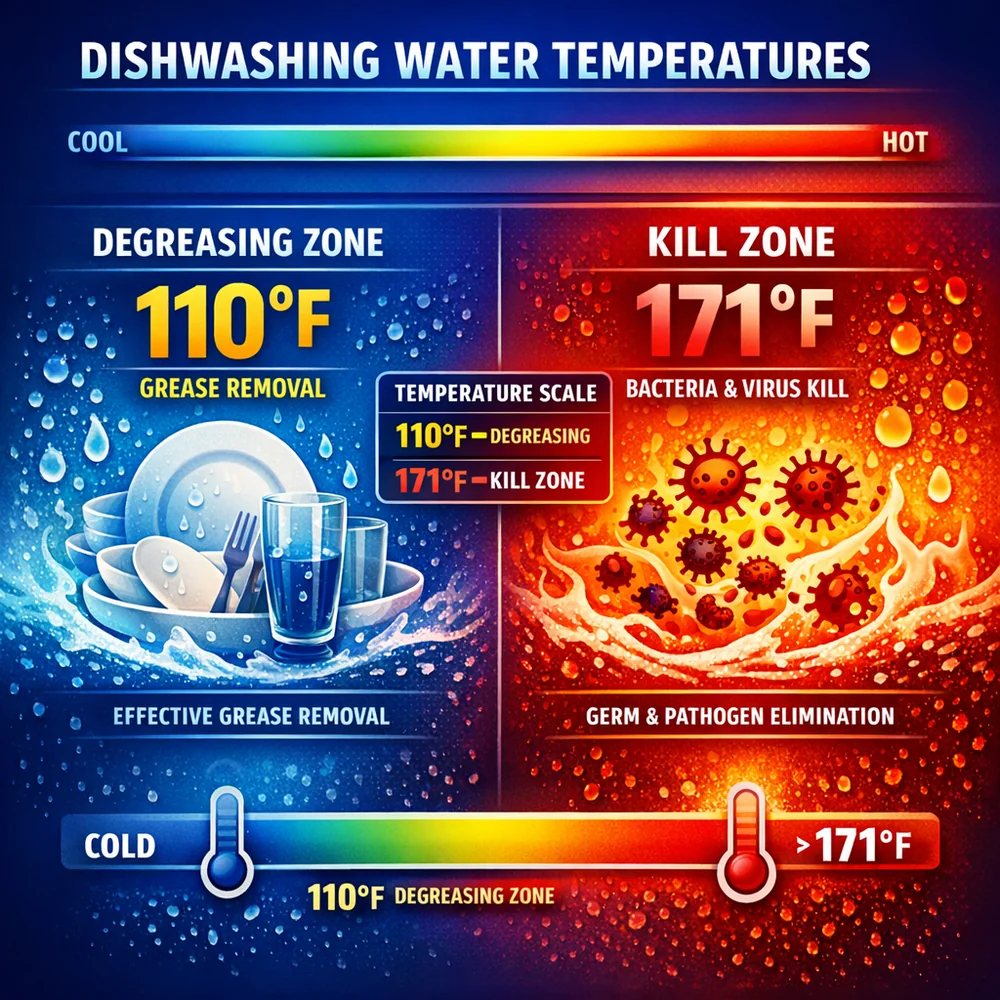
There is a common misconception that hot water kills bacteria during hand washing. The truth: water hot enough to kill bacteria on contact would cause severe burns.
The FDA Food Code establishes that killing temperatures for most harmful bacteria fall between 167°F and 212°F. Submersion in water that hot would seriously injure your hands. That is why proper dishwashing relies on removal rather than thermal destruction.
For optimal grease removal, water should be at least 110°F. This dissolves fats and oils that harbor bacteria while remaining safe for skin contact. Hotter water between 120°F and 140°F improves cleaning efficiency but requires protective gloves.
Research on enzyme detergents shows modern dish soaps enhance cleaning power at lower temperatures. Proteases break down proteins while lipases attack fats, compensating for temperatures below the bacterial kill threshold.
The Bottom Line Hand washing cannot kill bacteria through heat alone. Sanitization requires a separate chemical step or extremely hot water accessible only with professional equipment.
The Three-Sink Method
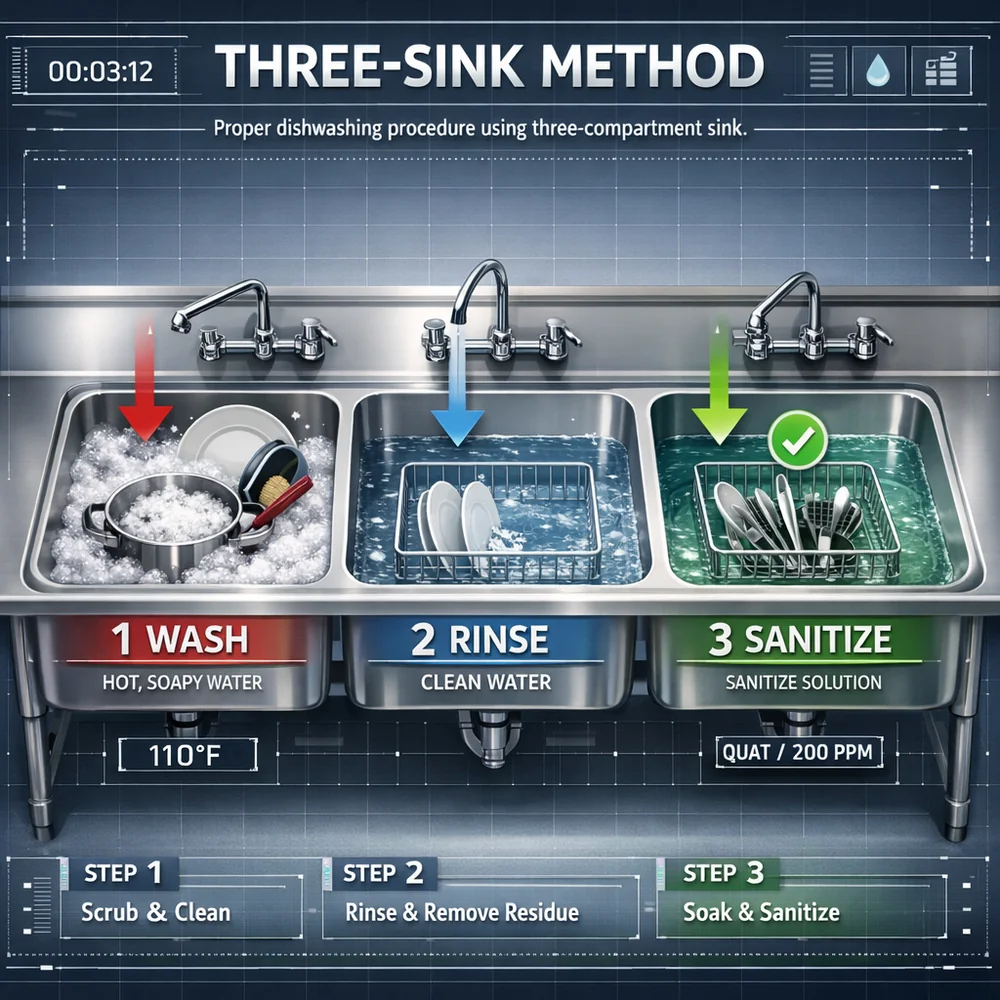
Professional kitchens use the three-compartment sink approach: wash, rinse, sanitize. This systematic method addresses each stage separately.
The first sink handles washing. Fill with water at least 110°F and add dish detergent. Scrubbing removes visible food particles and the biofilms bacteria use to anchor themselves. Mechanical action during this phase dislodges up to 99% of surface contamination before sanitization begins.
The rinse sink removes all soap residue. This step proves critical because detergent molecules can interfere with chemical sanitizers, reducing their effectiveness by 50% or more. Clean water at 110°F works well.
Sanitization happens in the third sink. For hot water sanitization, the FDA requires water temperature of 171°F with dishes submerged for 30 seconds minimum. Most home kitchens lack equipment to maintain such temperatures safely, making chemical sanitization the practical choice. Understanding plant-based disinfectant efficacy helps when selecting sanitizing agents.
The Bottom Line The three-sink method separates washing, rinsing, and sanitizing into distinct steps. Most homes use chemical sanitization since hot-water sanitization requires professional equipment.
Chemical Sanitizer Options
Three primary chemicals have FDA approval for food contact surfaces: chlorine bleach, iodine solutions, and quaternary ammonium compounds.
Chlorine solutions require 50 to 99 parts per million for effective sanitization, roughly one tablespoon of unscented bleach per gallon of water. Contact time must reach 30 seconds.
Iodine sanitizers work at 12.5 to 25 parts per million with the same 30-second contact time. They leave less odor than bleach but can stain certain materials.
Quaternary ammonium compounds (“quats”) need longer contact, at least one minute at 200 to 400 parts per million. Commercial kitchens often prefer quats because they remain effective in harder water.
Test strips provide the only reliable way to verify sanitizer concentration. Guessing creates either ineffective solutions or overly concentrated mixtures leaving harmful residues. Similar precision applies with dissolvable cleaning tablets.
The Bottom Line Use test strips to verify sanitizer concentration. Bleach works fast but smells; iodine stains; quats work in hard water but need longer contact time.
Washing Order Matters
The sequence in which items enter wash water affects both cleaning efficiency and cross-contamination risk.
Glassware goes in first. These items carry lightest soil loads, and drinking glasses represent direct mouth contact. Start with freshest, cleanest water.
Flatware follows glassware. Forks, spoons, and knives accumulate moderate residue. Pay special attention to handles where oils and bacteria collect from hand contact.
Plates and bowls enter next. They carry heavier deposits that cloud water more quickly. By this stage, the solution has already cleaned lighter items.
Pots, pans, and heavily soiled items always come last. Baked-on residues rapidly contaminate wash water; processing these first would compromise everything that follows.
Understanding material-specific approaches applies across cleaning contexts, similar to cleaning upholstery codes.
The Bottom Line Progress from cleanest to dirtiest: glassware, flatware, plates, then pots and pans. This maximizes wash water usefulness and minimizes cross-contamination.
The Sponge Problem
Kitchen sponges harbor more bacteria than almost any household item. A single sponge can contain billions of bacteria representing hundreds of species.
Duke University researchers found that the structural complexity of sponge material creates microenvironments where competing bacterial populations actually help each other thrive. This biodiversity makes sponges remarkably efficient at spreading contamination.
Bacterial transfer from sponges to surfaces averages about 5% per use. That sounds small, but the massive populations in contaminated sponges mean millions of organisms transfer with each wipe.
Heat sanitization provides temporary relief. Microwaving damp sponges for two minutes kills most bacteria, but recolonization begins immediately. The same structure that makes sponges effective cleaning tools makes complete sterilization nearly impossible.
Frequent replacement remains the most effective strategy. Replace weekly, or immediately after contact with raw meat. Consider dedicated sponges for different tasks.
Dish brushes with replaceable heads offer a more hygienic alternative. Open structures dry quickly, and bristle designs eliminate moisture-trapping pores. Resources on biodegradable dish soap options often cover sustainable scrubbing alternatives.
The Bottom Line Sponges are bacterial factories. Replace weekly, microwave to buy time, or switch to dish brushes that dry faster and harbor fewer pathogens.
Air Drying Beats Towel Drying
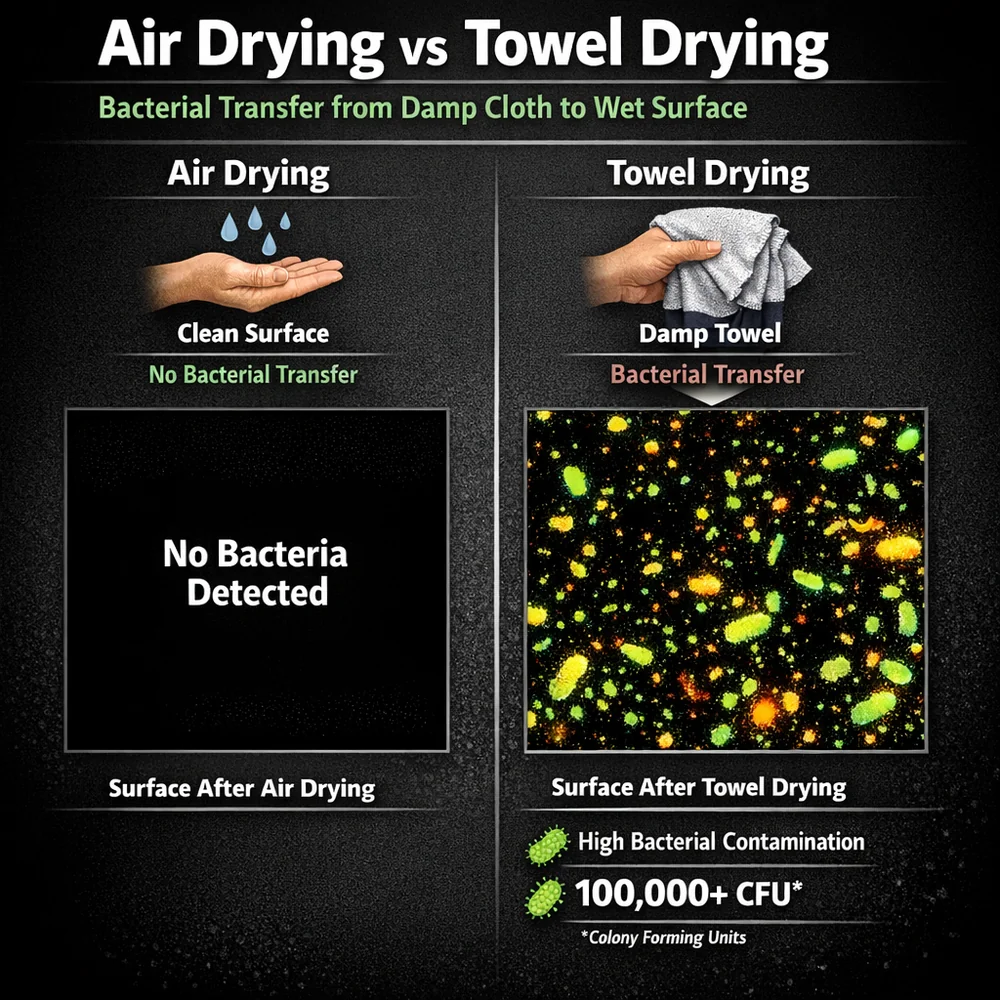
Food safety experts overwhelmingly recommend air drying for sanitized items.
Air drying eliminates recontamination. Even freshly laundered dish towels carry bacterial populations that transfer to wet surfaces. Studies show cloth towels used for drying harbor coliform bacteria within 24 hours of first use.
Evaporation continues the sanitization effect. As water leaves dish surfaces, remaining bacteria experience osmotic stress that further reduces viability. Warm, ventilated drying areas accelerate this.
Position dish racks where air circulates freely. Angle dishes to promote drainage and prevent water pooling.
If time requires towel drying, use freshly laundered towels and replace frequently. Never use damp towels. The principles of laundry stripping apply when deep cleaning dish towels.
The Bottom Line Air dry whenever possible. Towels recontaminate sanitized dishes within seconds of contact.
Delicate Glassware and Crystal
Fine crystal, antique china, and delicate glassware require modified handling.
Lead crystal softens at high temperatures and reacts with acidic cleaners. Use lukewarm water with minimal detergent and soft cloths rather than abrasive sponges.
Hand-painted china and gilded edges require especially gentle treatment. Gold decorations wear away with repeated detergent exposure. Wash individually with minimal agitation.
Understanding how to address cloudy film on glassware helps distinguish removable hard water deposits from permanent etching damage.
When uncertain about material composition, test cleaning approaches on inconspicuous areas first.
The Bottom Line Delicate items need lukewarm water, minimal soap, soft cloths, and gentle handling. When in doubt, test first.
Cutting Board Sanitization
Cutting boards present unique challenges due to knife scars and prolonged food contact.
Plastic boards accept harsher chemical treatment. After normal washing, they can soak in diluted bleach matching FDA concentrations. The non-porous surface allows complete residue rinsing.
Wooden boards require different approaches. Bleach damages wood fibers. The porous nature provides some antimicrobial protection as bacteria drawn into wood grain often die from desiccation, but surface contamination still needs attention.
Coarse salt with lemon or lime provides effective wooden board sanitization. Salt’s abrasive action removes contamination while citric acid kills bacteria. This approach appears throughout discussion of cast iron and wood cutting board care.
Regardless of material, boards used for raw meat require immediate cleaning. Never allow protein residues to dry.
The Bottom Line Bleach works on plastic boards. Salt and lemon work on wood. Either way, clean immediately after raw meat contact.
Cast Iron Considerations
Cast iron demands distinct handling that prioritizes seasoning preservation.
Modern dish soap does not automatically destroy seasoning. The polymerization process creates chemical bonds between oil molecules and the iron surface that resist mild detergent exposure. However, harsh scrubbing or prolonged soaking can compromise the layer.
Warm water and gentle scrubbing handle most needs. A stiff brush or chain mail scrubber removes stuck food. For stubborn residues, brief simmering with plain water loosens deposits.
Thorough drying immediately after washing prevents rust. Heat the pan briefly on the stovetop to evaporate residual water. Light oil application after drying maintains seasoning. Details appear in guides on cast iron and wood cutting board care.
The Bottom Line Modern soap is fine for cast iron. Dry immediately and oil lightly. Avoid prolonged soaking and aggressive scrubbing.
Hard Water Challenges
Calcium and magnesium in hard water bind with surfactant molecules, reducing cleaning power. Higher detergent concentrations help but create residue and rinsing problems.
Mineral deposits left by hard water trap bacteria beneath their surface. These often appear as white or gray films on glassware. Periodic acid treatment with vinegar or citric acid dissolves accumulated minerals.
Chemical sanitizer effectiveness varies with hardness. Chlorine loses potency in very hard water while quaternary ammonium compounds maintain effectiveness across wider ranges.
Resources on dishwasher filter maintenance address hard water strategies applicable to hand washing.
The Bottom Line Hard water reduces cleaning power and leaves mineral deposits. Use more soap, periodic vinegar treatment, and consider quats over bleach for sanitization.
Building Effective Routines
Consistent routines reduce both effort and contamination risk.
Process dishes promptly rather than letting residues dry. Fresh food washes away easily; dried residues require soaking and extra scrubbing.
Prepare everything before starting: fresh wash water, clean rinse water, properly concentrated sanitizer, and adequate drying space. Interrupting the process increases contamination opportunities.
Clean sinks before filling with wash water. The sink accumulates bacterial populations from previous use. A quick sanitization prevents introducing contamination to the first items cleaned.
Maintain separation between raw and cooked food areas throughout. Items that contacted raw proteins should wait until after other dishes clear.
The Bottom Line Prepare everything first. Clean sink before filling. Process raw meat dishes last. Promptness beats convenience.
Hand Hygiene Integration
Contaminated hands transfer bacteria throughout the process.
Wash hands thoroughly before starting, at least 20 seconds with soap and warm water covering all surfaces including between fingers. The FDA recommends repeating if you touch face, hair, or other surfaces during washing.
Faucet handles pose contamination risk. Turning water on and off with clean hands recontaminates them. Touch-free faucets eliminate this; manual faucets benefit from handle sanitization before beginning.
Detailed protocols appear in resources on hand washing hygiene protocols.
The Bottom Line Wash hands before starting and after any interruption. Faucet handles are contamination vectors.
Common Problem Solutions
Baked-on residue responds poorly to immediate scrubbing. Fill pans with hot water and soap immediately after cooking. Soaking loosens bonds, making cleaning dramatically easier.
Grease on plastic containers is stubborn because lipids bond to plastic polymers. Hot water and alkaline soaps help. Baking soda paste provides gentle abrasion.
Lipstick on glassware requires alcohol-based pre-treatment. Standard soap struggles with waxy cosmetic bases. Quick wipe with rubbing alcohol before washing eliminates residue.
Burned pots benefit from boiling water with baking soda before scrubbing. The alkaline solution and bubbling lift carbonized residue.
Resources on eco-friendly solid dish soap reveal concentrated formulations that tackle grease effectively.
The Bottom Line Soak baked-on messes. Use baking soda for grease or burns. Use alcohol for cosmetics. Work with the chemistry, not against it.
Environmental Considerations
Running water during scrubbing wastes significant resources. Basin-filling uses substantially less water than continuous running.
Moderate temperatures balance effectiveness against energy consumption. Water beyond 120°F provides diminishing returns while consuming progressively more energy.
Biodegradable soaps reduce environmental impact, but effectiveness matters most. Ineffective products require more quantity and more water, potentially negating ingredient benefits. Resources on greenwashing in cleaning labels help evaluate claims critically.
The Bottom Line Fill basins rather than running water. Moderate temperatures save energy. Choose effective products over marketed “green” options.
Complete Kitchen Hygiene
Dishwashing exists within a broader system. Multiple practices reinforce overall food safety.
Countertops need regular sanitization to prevent transferring bacteria to clean dishes placed on contaminated surfaces.
Towel management matters. Dish towels, hand towels, and cleaning cloths accumulate bacteria. Regular hot laundering prevents them becoming contamination reservoirs. Techniques for removing residue buildup ensure towels stay absorbent and clean.
Proper food storage reduces the contamination burden. Covered foods resist airborne contamination; refrigeration slows bacterial growth.
Cross-contamination pathways exist throughout the home. Resources on washing cleaning cloths and microfiber address broader hygiene considerations.
The Bottom Line Dishwashing is one part of kitchen hygiene. Countertops, towels, food storage, and hand hygiene all interconnect.
References
- FDA Food Code 2022. U.S. Food and Drug Administration.
- NSF International Germ Study 2011. Kitchen Sponge Contamination Research.
- Duke University Sponge Microbiome Study 2022. National Science Foundation.
- CDC Guidelines for Environmental Cleaning in Healthcare Facilities.
- American Society for Microbiology. Bacterial Survival on Kitchen Surfaces.