DIY Foaming Soap Ratios: Water, Castile, and Glycerin Formulation Guide
Table of Contents
Things You'll Learn From This Article:
- A good starting mix for foaming soap is about 4 parts water to 1 part liquid castile soap, then adjust if your pump foams too weakly or clogs.
- Thinner soap works better in foaming pumps, so if the foam is poor, changing the water-to-soap ratio often fixes it.
- Pour the soap into the bottle first and add water afterward to avoid making a bottle full of bubbles while mixing.
- Distilled water helps your homemade soap last longer and stay clear because it doesn’t have minerals or microbes that interfere with soap.
- Hard tap water can turn soap cloudy and leave residue, so filtered water is a better choice if distilled isn’t available.
- Essential oils don’t truly mix with water, so they will separate over time unless you shake the bottle before use or add a special mixing agent.
- Shaking the dispenser before each use is the simplest way to handle essential oil separation without adding extra ingredients.
- Castile soap works well for foaming because it’s gentle, biodegradable, and lathers easily when diluted.
- Castile soap is naturally alkaline, which slows some bacterial growth, but it still isn’t preserved enough to last forever.
- Adding a small amount of vegetable glycerin can help prevent dry hands, especially in dry or cold weather.
- Too much glycerin can make soap thicker and reduce foam, so small amounts work best.
- Making small batches that last one to two weeks lowers the chance of mold or bacteria growing in your soap.
- Cleaning and sanitizing the foaming pump regularly keeps it working well and prevents buildup that ruins foam.
- Never put regular thick liquid soap into a foaming dispenser, because it can clog and permanently damage the pump.
Making your own foaming hand soap goes beyond just saving money, though that part is certainly nice. A single bottle of castile soap concentrate can produce dozens of dispenser refills, dropping your per-use cost to literal pennies. But the more compelling reasons often involve controlling ingredients, avoiding chemicals you do not want, and reducing the endless plastic waste from buying pre-mixed products.
The thing is, creating stable foaming solutions requires more than dumping soap into water and hoping for the best. The ratio matters critically, as does the type of water, the choice of base soap, and anything you add for moisturizing or scent. Get these wrong and you end up with solutions that clog pumps, grow mold, separate in the dispenser, or refuse to foam properly.
This guide gives you the specific measurements and ratios you need for reproducible results. Understanding why each parameter matters lets you troubleshoot problems when they arise and adjust formulations to match your preferences.
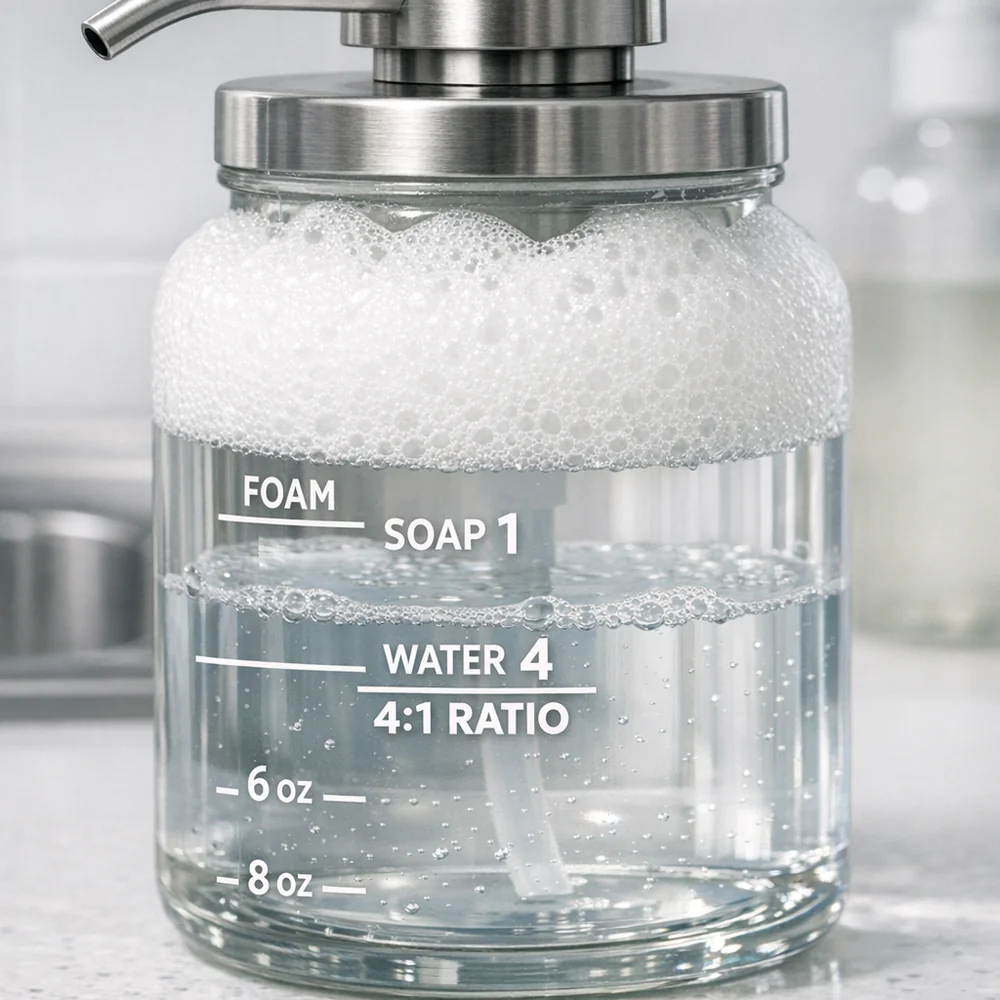
Getting the Water to Soap Ratio Right
The fundamental ratio for foaming soap puts water as the dominant ingredient. Unlike regular liquid soap that dispenses as a thick gel, foaming soap needs to pass through a specialized pump mechanism that mixes it with air. This pump needs thin, free-flowing liquid to work. Thicker solutions simply cannot be drawn through the narrow intake tube and fine mesh screen that create the foam.
The standard starting point is four parts water to one part liquid soap concentrate. This produces a solution thin enough for most foaming pumps while staying concentrated enough for stable foam with adequate cleaning power. Some people can push this to five or even six parts water per part soap without major foam quality loss, while others prefer a richer three to one mixture.
The best ratio depends partly on your specific pump mechanism. Pumps with finer mesh screens and narrower intake tubes need thinner solutions, while more robust pumps handle thicker mixtures. If your foam seems weak despite using good ingredients, adjusting the ratio in either direction often fixes it.
For accurate measuring, use the dispenser bottle itself as your measuring vessel. If your dispenser holds 10 ounces, add 2 ounces of soap concentrate first, then fill the remaining 8 ounces with water. Pouring soap in first prevents excessive foaming during mixing, since pouring water onto concentrated soap creates way more agitation than the reverse.
Key Insight: Start with 4 parts water to 1 part liquid soap. Adjust thinner (5:1) for economy or thicker (3:1) for richer foam, depending on your pump.
Why Distilled Water Makes a Difference
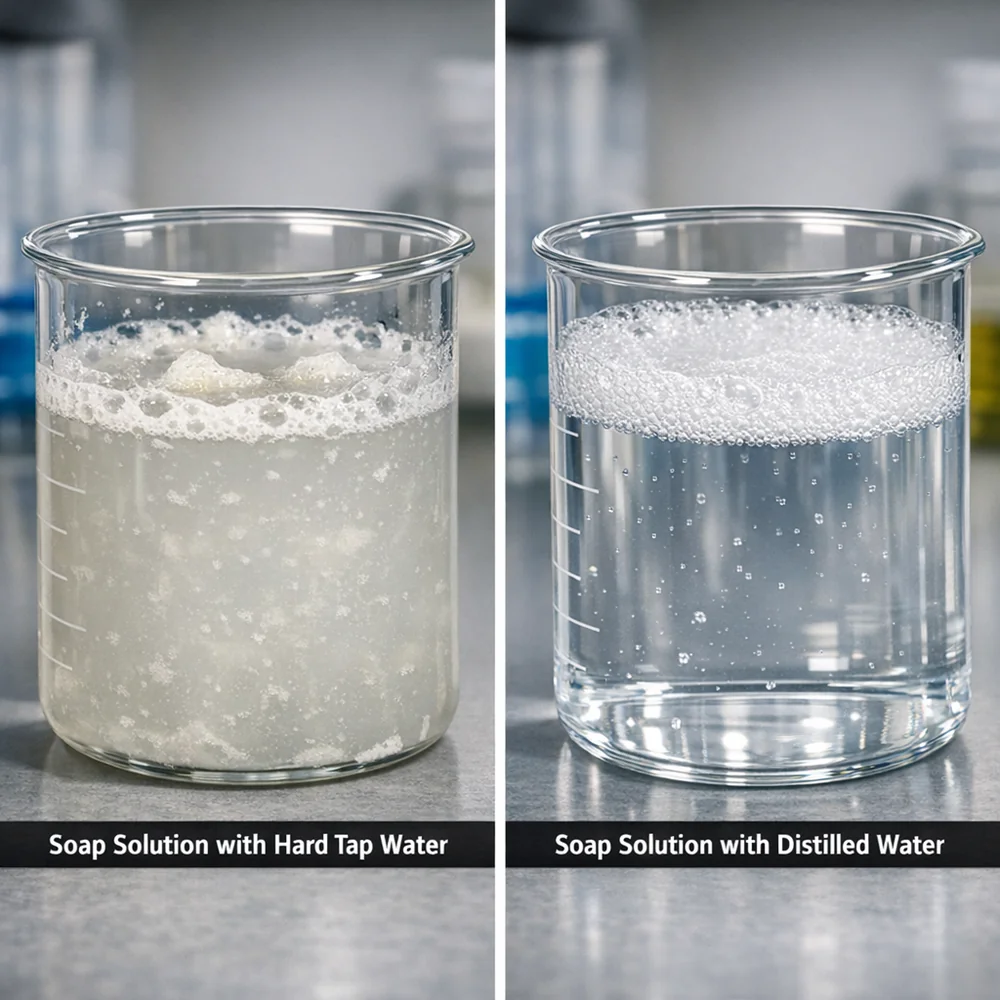
The type of water you use significantly affects how long your homemade foaming soap stays usable. Tap water contains dissolved minerals, chlorine, and trace microbial populations that interact with soap molecules and can promote contamination over time. Distilled water eliminates most of these concerns, extending shelf life and improving solution stability.
Hard water creates particular problems for true soap-based formulations as opposed to synthetic detergent-based ones. The calcium and magnesium ions in hard water react with fatty acid salts in soap, forming insoluble soap scum. This clouds your solution, leaves residue in dispensers, and reduces how much active soap is actually available for cleaning. The reaction happens slowly, so a solution that looks clear at first may turn cloudy over the following days.
Distilled water also lacks the microbial load present in many municipal supplies. While chlorination handles dangerous pathogens, residual bacteria can still colonize soap solutions when preservatives are absent. Starting with sterile distilled water delays this colonization.
If distilled water seems impractical or expensive, filtered water is a reasonable compromise. Carbon filtration removes chlorine and many organic contaminants, while mineral filters or water softeners address hardness. Even basic pitcher filters improve water quality enough to extend homemade soap shelf life compared to straight tap.
Key Insight: Hard water reacts with soap to form scum that clouds your solution and clogs pumps. Distilled water prevents this reaction entirely.
Dealing With Essential Oil Separation
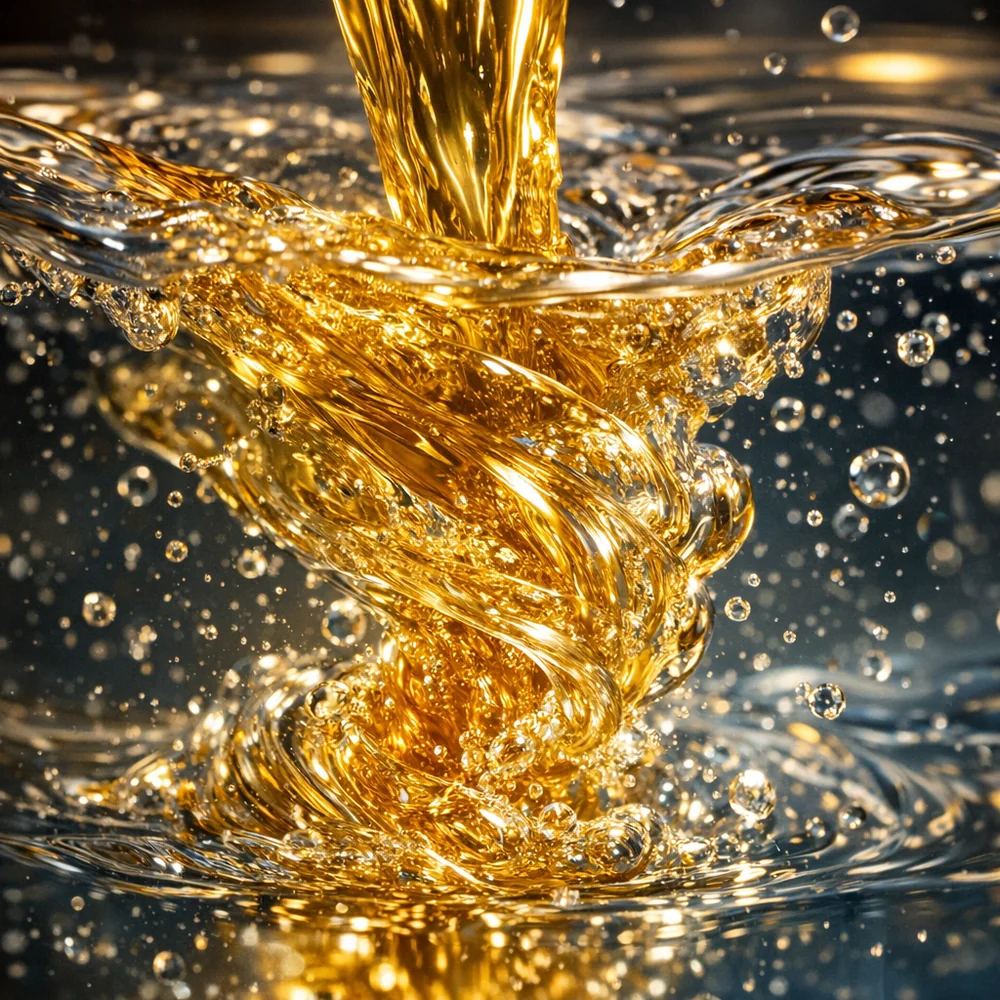
Adding essential oils for fragrance or supposed therapeutic benefits introduces complexity that simple soap-and-water mixtures avoid. Essential oils are hydrophobic, meaning they do not dissolve in water. Given time, they separate from the watery soap solution. This creates uneven fragrance distribution and can clog dispenser components.
When you first shake a mixture containing essential oils, the agitation creates a temporary emulsion with tiny oil droplets suspended throughout. Within hours or days, depending on oil type and concentration, these droplets merge and float to the surface or sink to the bottom. Each pump then dispenses inconsistent amounts of fragrance.
Fixing separation requires either emulsifying agents or accepting that you need to shake before each use. Polysorbate 20, sold as Tween 20, is a common cosmetic emulsifier that helps oil and water mix more stably. Adding roughly half the volume of Polysorbate 20 compared to the essential oil creates more durable emulsions. But this adds cost and complexity while introducing a synthetic ingredient some people prefer to avoid.
The practical approach for simple formulations is just shaking the dispenser before each use. This redistributes separated oils for reasonably even dispensing. The habit is easy to develop and avoids the hassle of failed emulsion attempts.
Key Insight: Essential oils separate from water-based soap. They float, sink, or clog pumps unless properly emulsified with a dispersant.
Why Castile Soap Works Well
Castile soap has become the default choice for DIY foaming soap, and understanding why helps you formulate more effectively. True castile soap is made from olive oil saponified with lye, producing a gentle, biodegradable cleanser compatible with most skin types.
The liquid castile sold in stores differs somewhat from traditional castile. Brands like Dr. Bronner’s combine olive oil with coconut and other oils, creating soap with more lathering power than pure olive castile. This blend works better for foaming since the coconut-derived components improve bubble formation and foam stability.
Castile soap’s high pH, typically around 9 to 10, provides some inherent antimicrobial protection by discouraging bacterial growth. This alkalinity means castile is not truly pH-balanced for skin, though brief contact time during hand washing minimizes irritation concerns for most people.
The main limitation is castile’s reaction with hard water. Households with very hard water may find that detergent-based concentrates or synthetic surfactant blends produce better results. Detergents use petroleum or coconut-derived surfactants that do not form scum with minerals.
Key Insight: Liquid castile soap (like Dr. Bronner’s) blends olive and coconut oils for better foam. Pure olive castile produces weaker lather.
Adding Glycerin for Moisturizing

Plain foaming soap can leave hands feeling dry, especially in winter or low-humidity environments. The degreasing action that removes dirt also strips natural oils from skin. Adding vegetable glycerin counteracts this by providing humectant properties that draw moisture to the skin surface.
Glycerin is a byproduct of soap making, so it already appears naturally in some commercial castile soaps. Additional supplementation increases the moisturizing effect. The typical addition is one-half to one teaspoon per cup of finished foaming soap solution. Higher concentrations boost moisturizing but may affect foam quality and increase thickness.
Whether glycerin comes from vegetables like palm, coconut, or soy or from animal sources like tallow, it functions identically. Most commercially available glycerin is now plant-sourced to accommodate vegetarian and vegan preferences.
In humid environments, glycerin’s moisture-attracting nature can be problematic. By drawing moisture to skin, it may leave hands feeling slightly tacky when ambient humidity is high. People in tropical climates or during humid seasons might prefer reducing or eliminating glycerin. The moisturizing benefit proves most valuable in dry indoor environments during heating season.
Key Insight: Add 1/2 to 1 teaspoon of vegetable glycerin per cup of foaming soap solution to counteract the drying effect of soap.
Keeping Mold Out of Your Soap
Without industrial preservative systems, homemade foaming soap invites microbial colonization. Mold, yeast, and bacteria can all establish populations in soap solutions, creating visible growths, off odors, and potential health hazards. Prevention requires understanding how contamination happens and implementing practices that minimize risk.
Mold needs moisture and organic nutrients. Soap solutions provide plenty of moisture, while fatty acid components of soap supply carbon sources for microbial metabolism. The higher pH of castile-based solutions slows growth but does not prevent it for all species. Some molds and bacteria tolerate alkaline conditions quite well.
Batch size is your most practical defense. Rather than making months of soap at once, prepare quantities sized for one to two weeks of use. This short timeline means any early-stage contamination gets discarded before reaching problematic levels. The minor inconvenience of more frequent preparation beats dealing with moldy soap.
Dispenser hygiene matters equally. Each refill is an opportunity to break contamination cycles or perpetuate them. Rinsing with hot water provides minimal protection. Periodic sanitization with dilute bleach solution at one teaspoon per quart of water, or isopropyl alcohol, kills established biofilms that simple rinsing cannot remove.
Key Insight: Homemade soap lacks preservatives. Make small batches (1-2 weeks supply) and sanitize dispensers between refills to prevent mold.
Maintaining Your Pump Mechanism
Foaming pumps accumulate soap residue internally, gradually degrading performance until they fail to foam properly or stop working entirely. Regular cleaning extends pump life and prevents the frustrating foam quality decline many homemade soap users experience.
The pump assembly consists of the outer housing, the spring-loaded actuator, the intake tube extending into the solution, and the mesh screen that mixes soap with air to create foam. Residue can accumulate anywhere, but the mesh screen is the most common failure point. Soap film builds up in mesh openings, reducing airflow until foam production suffers.
To clean a pump, remove it from the dispenser and flush with warm water by repeatedly pumping while holding the intake under a running faucet. For more thorough cleaning, soak the assembly in warm water with a small amount of white vinegar for 30 minutes, then flush again. The mild acidity dissolves soap scum deposits.
Eventually pumps need replacement when cleaning no longer works. Springs weaken, seals degrade, and mesh screens fail. Replacement pumps sized for common dispenser necks are widely available. Keeping spares on hand prevents reverting to squeeze bottles when your current pump dies unexpectedly.
Key Insight: Soak clogged foaming pumps in warm water with white vinegar for 30 minutes, then flush thoroughly to restore mesh screen airflow.
Why Regular Soap Destroys Foaming Pumps
Regular liquid soap, the thick kind for traditional pump dispensers, will quickly clog and destroy foaming dispensers. Understanding why helps you appreciate proper dilution.
Regular liquid soap contains 15 to 30 percent active surfactant. Foaming soap contains only 3 to 6 percent. Traditional pumps simply push thick liquid through a nozzle. Foaming pumps must draw thin liquid through narrow tubes, mix it with air through fine mesh, and expel foam.
When thick soap enters a foaming pump, problems compound quickly. The viscous fluid strains the spring mechanism. Residue accumulates in the mesh exponentially faster than with properly diluted soap. The intake tube may fail to draw enough liquid, producing sputtering or nothing at all.
If you accidentally fill a foaming dispenser with regular soap, immediate flushing with warm water may save the pump. Remove the assembly and work it under running water until fluid moves freely. If thick soap has sat there more than a few hours, residue may have set in the mesh, requiring the vinegar soak treatment.
Key Insight: Regular soap is 5x more concentrated than foaming soap. Using it undiluted clogs the pump’s mesh screen within a few uses.
Mixing Different Soap Brands Safely
People often wonder whether combining different soap brands creates safety problems or reduces effectiveness. Mixing different brands of similar soap types is generally safe. The concerning exception involves mixing true soap with synthetic detergents, which can reduce effectiveness of both.
True soaps and synthetic detergents work through similar mechanisms, surrounding oil droplets with surfactant molecules, but carry opposite electrical charges. Soaps are anionic with negatively charged head groups. Some detergents are cationic or non-ionic. When anionic and cationic surfactants meet, they can neutralize each other, forming ineffective complexes that reduce overall cleaning power.
Within the same surfactant category, mixing brands presents no safety concern. Different castile brands can be combined freely since they all contain similar fatty acid salts. Different synthetic hand soaps can likewise be mixed since most use compatible surfactant blends. Problems arise only when crossing the soap-detergent boundary.
Practically, pick a base type and stick with it. If you start with castile, continue with castile. If you prefer synthetic foaming concentrates like baby wash, continue with those. Mixing types creates unpredictable results.
Key Insight: Mixing true castile soap with synthetic detergent can neutralize both. Stick to one type or the other within a single batch.
Troubleshooting Common Problems
Despite following recommendations, homemade foaming soap sometimes fails to perform. Systematic troubleshooting identifies causes quickly.
Thin, watery foam that collapses quickly suggests too much water or soap that is too dilute. Try reducing the ratio toward 3:1 or 2:1. If you are already at 3:1 with concentrated castile and foam is still weak, the soap itself may be old. Surfactant potency decreases over time, especially after containers are opened.
A pump producing no output or only sputtering usually indicates clogging or air locks. Check that the intake tube is fully submerged. Prime by pumping repeatedly until liquid flows. If priming fails, remove and flush the pump. Persistent clogging despite cleaning means the solution is too thick or contains particles.
Unusual cloudiness or floating particles indicate contamination or soap scum formation. Discard the batch, sanitize the dispenser thoroughly, and make a fresh batch with distilled water. If cloudiness recurs, try a different soap brand or dispenser to isolate the variable.
Making your own foaming hand soap transforms a commodity purchase into simple home production. The few minutes required to mix a batch replaces the cycle of buying, transporting, and discarding plastic bottles. Material savings accumulate while waste reduction supports broader sustainability goals.
The requirements are straightforward once understood. Use distilled or filtered water at a four-to-one ratio with liquid castile or compatible concentrate. Add glycerin if you want moisturizing. Shake before use if essential oils are included. Prepare small batches, sanitize dispensers regularly, and clean pumps when foam quality declines.
The satisfaction of knowing exactly what goes into your soap adds value beyond economics. No hidden fragrances, no unnecessary preservatives, no optical brighteners or other additives serving manufacturer interests more than yours. Just soap, water, and perhaps some glycerin or natural fragrance, mixed to your specifications as part of a zero-waste laundry routine.
Key Insight: Weak foam means too much water; clogged pump means too much soap. Adjust ratios and flush the pump to troubleshoot.
The Bottom Line
References
- CDC. “Distilled Water and Filtration for Home Use.”
- Dr. Bronner’s. “Liquid Soap Dilutions Cheat Sheet.”
- ACS. “Soap Chemistry and Surfactant Science.”
- FDA. “Microbiological Safety of Cosmetics.”
- Healthline. “How to Make Your Own Castile Soap.”