Mending and Repairing Clothes: Essential Techniques for Garment Longevity
Table of Contents
Things You'll Learn From This Article:
- You can keep wearing clothes longer with just basic tools like a needle, thread, and simple household items.
- Small holes in sweaters get bigger fast, so reinforcing thin spots early prevents bigger repairs later.
- Matching yarn taken from the garment itself makes knit repairs blend in much better.
- Buttons last longer when they have a little space underneath, not sewn flat against the fabric.
- Using stronger thread and extra reinforcement matters more on heavy items like coats.
- Patching jeans works best when the stress is spread out with lots of small stitches instead of one seam.
- Decorative repairs are an option, not a mistake, and can make worn clothes more interesting.
- Most stuck zippers just need cleaning or simple lubrication, not replacement.
- Closing zippers before washing helps prevent future snags and damage.
- Iron-on hemming tape is quick but doesn’t last as long as sewing, especially with frequent washing.
- The right hemming method depends on how often and how roughly the garment is worn.
- Zigzag-cut edges fray less because loose threads don’t have room to unravel.
- Elastic waistbands can be replaced cheaply instead of throwing out stretched-out clothes.
- Choosing the right type and width of elastic makes the repair feel like the original fit.
- Faded black clothes can look new again if the dye matches the fabric type.
- Clean fabric and steady dyeing conditions help avoid patchy or uneven color.
- Waterproof jackets stop repelling water over time, but the coating can be restored.
- Washing outerwear properly before reapplying waterproofing helps the treatment work.
- Heat from a dryer often activates or reactivates waterproof coatings.
- Fixing clothes is usually about patience and timing, not advanced skill or expensive gear.
Learning to fix your own clothes saves money and keeps your favorite pieces in rotation for years. You don’t need to be a seamstress or own fancy equipment. Most repairs take basic supplies you probably already have: a needle, some thread, and a little patience.
The skills covered here range from nearly invisible fixes to deliberately decorative patches.
Whether you’re dealing with a loose button on your best shirt or a moth hole in a vintage sweater, there’s a technique that matches both the damage and your skill level. Once you get comfortable with a few basic repairs, you’ll stop throwing out clothes that just need a little attention.
Darning Holes in Knits
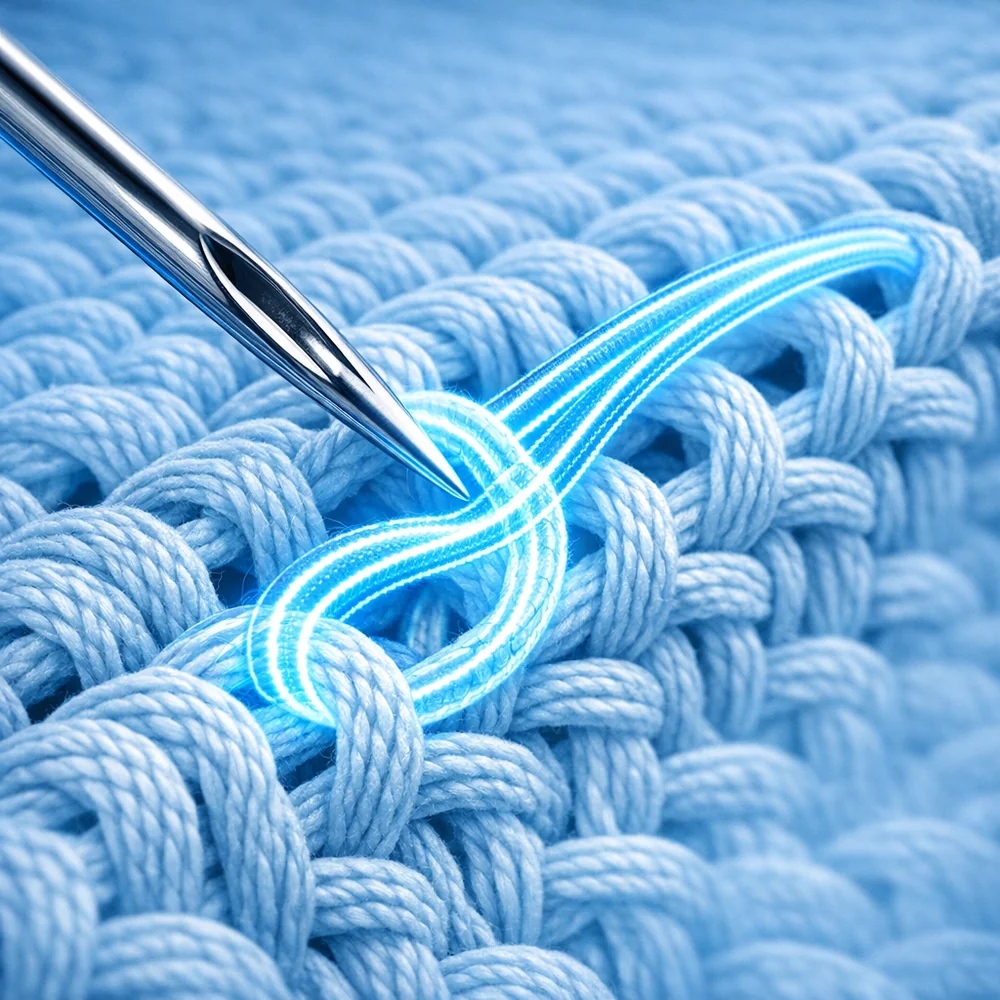
Knits are tricky because they’re made of interlocking loops. When one loop breaks, the surrounding loops lose their anchor and the hole keeps growing. That’s why you’ll notice a small hole in your sweater one day and a much bigger one a week later. Darning recreates the fabric structure across the damaged area, stopping the spread and making the garment wearable again.
Swiss darning is perfect for reinforcing spots that are getting thin before they become actual holes.
You thread a needle with yarn that matches your garment’s color and weight, then follow the path of the existing stitches, effectively doubling them in the weak area. Done correctly, it’s nearly invisible on the outside. This is prevention more than repair, catching problems early before they get worse.
For holes that have already opened up, you’ll need to weave a patch. Start by creating a framework of parallel threads across the opening, then weave perpendicular threads over and under to build new fabric. A darning mushroom (or a light bulb in a pinch) gives you a stable, slightly domed surface to work on.
For the best color match, carefully unravel some yarn from an inconspicuous seam allowance or hem of the garment itself. This guarantees the fiber, texture, and color will be identical to the original.
Key Insight: Swiss darning reinforces thinning fabric before a hole forms, following the original knit structure for an invisible repair.
Key Insight: For perfectly invisible repairs, use yarn taken directly from the garment’s own seam allowance or hem.
Reattaching Buttons Securely
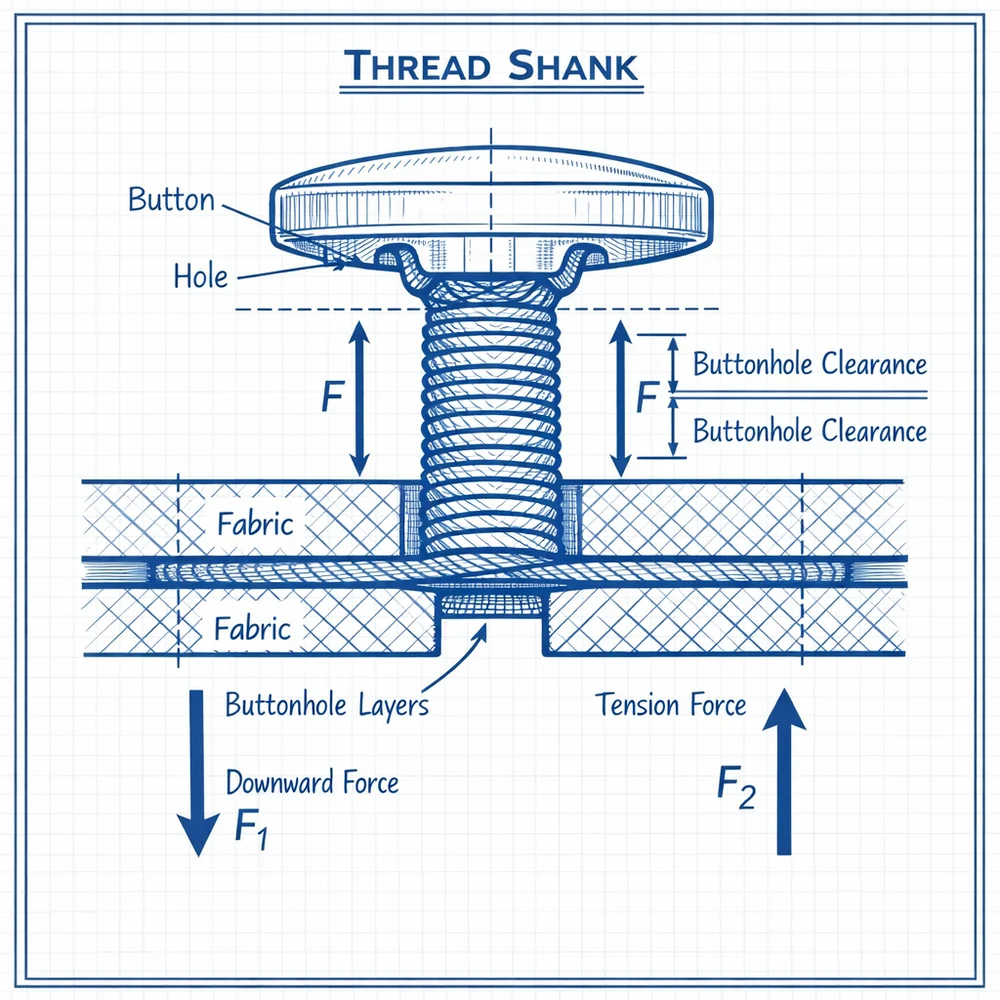
A loose or missing button seems like such a small thing, but it can make a perfectly good shirt or coat feel unwearable. The key to a button that stays put is creating what’s called a thread shank: a small column of wrapped thread between the button and the fabric.
This shank provides space for the buttonhole layers to sit when the garment is fastened.
Without it, the button pulls flat against the fabric, and over time the thread cuts into the material. The button eventually tears through. With a proper shank, the stress is distributed and both the button and fabric last much longer.
Here’s the trick: place a toothpick or thick needle between the button and fabric while you sew through the holes multiple times. When you’ve made enough passes (five or six is usually good), remove the spacer and wrap the thread around the threads beneath the button several times to create a sturdy column. Finish with a few small stitches on the back and a secure knot.
For coats and heavy garments, use polyester thread rather than cotton. Cotton breaks down faster and can’t handle the repeated stress of buttoning a winter coat every day. If the fabric behind the button has gotten thin, reinforce it with a small piece of interfacing or a second button on the inside before reattaching.
Key Insight: A thread shank creates necessary space behind the button, preventing it from cutting into the fabric and reducing stress on the threads.
Patching Knees in Jeans with Sashiko
Jeans always wear out at the knees first because of all the bending and stretching they absorb there. Iron-on patches are a quick fix, but they tend to peel away after several washes. The Japanese technique called sashiko does the job much better and looks fantastic too.
Sashiko uses running stitches worked in a grid pattern, traditionally white thread on indigo fabric.
This approach spreads the stress across a wide area instead of concentrating it along a single seam. Cut a patch from similar weight denim about two inches larger than the damaged area on all sides. Pin it to the inside of the jeans for a subtle look, or the outside if you want the patch visible as a design element.
Work running stitches in rows about a quarter inch apart, creating a grid that covers the patch completely. Sashiko needles are longer than regular needles so you can load multiple stitches before pulling through, which speeds things up considerably. The stitches should be slightly longer on the surface than the gaps between them, creating that distinctive dotted line effect.
The Japanese word boro describes textiles that have been patched repeatedly until they become layered documents of use and repair. There’s something satisfying about jeans that show their history rather than hiding it.
Key Insight: Sashiko distributes stress across a wide grid of stitches, making it far more durable than standard edge stitching.
Fixing Stuck Zippers with Lubrication
A stuck zipper can make an otherwise functional jacket or bag completely unusable, but the fix is usually simple. Zippers fail when metal teeth oxidize, debris accumulates in the track, or the slider gets misaligned. Before reaching for lubricant, look closely to identify what’s actually causing the problem.
If fabric is caught in the slider, gently work it free with a small screwdriver or the edge of a credit card.
If the slider has become loose and doesn’t close the zipper properly, replacement sliders are available at fabric stores and are easy to install. But if the zipper simply sticks and resists smooth operation, lubrication is your answer.
Run a graphite pencil along both sides of the zipper teeth. The graphite acts as a dry lubricant that won’t stain fabric or attract dirt. Beeswax works similarly and has been used for this purpose for generations. For metal zippers that are really stuck, a tiny amount of petroleum jelly applied with a cotton swab can break things loose, but wipe away any excess to prevent fabric staining.
Keep zippers clean by closing them before washing, which helps prevent fabric from catching in the mechanism during machine agitation.
Key Insight: Graphite pencil lead is an excellent dry lubricant for zippers because it reduces friction without staining fabric.
Hemming Tape Versus Sewing
Sometimes you need to shorten a pair of pants or repair a falling hem quickly. Hemming tape offers an alternative to sewing, but you should understand the tradeoffs before choosing one method over the other.
Hemming tape is a fusible adhesive web that melts when you iron it, bonding the folded fabric layers together.
It’s fast, it requires no sewing skills, and the results can look quite professional. The catch is that the adhesive bond weakens over repeated washing and drying. It works best on natural fibers that can tolerate higher iron temperatures; synthetic fabrics may melt or distort before the tape even activates.
A hand-sewn hem using a blind hem stitch is more work but creates a permanent, flexible result. The blind hem catches only a few threads of the outer fabric with each stitch, so it’s nearly invisible from the outside. Machine hemming offers speed comparable to tape with durability closer to hand sewing.
For casual clothes like jeans, a visible double-needle hem actually provides superior strength. Match your method to how the garment will be used.
Key Insight: Hemming tape provides a fast, no-sew solution for natural fibers, but requires caution with synthetics to avoid melting.
Preventing Fraying with Pinking Shears
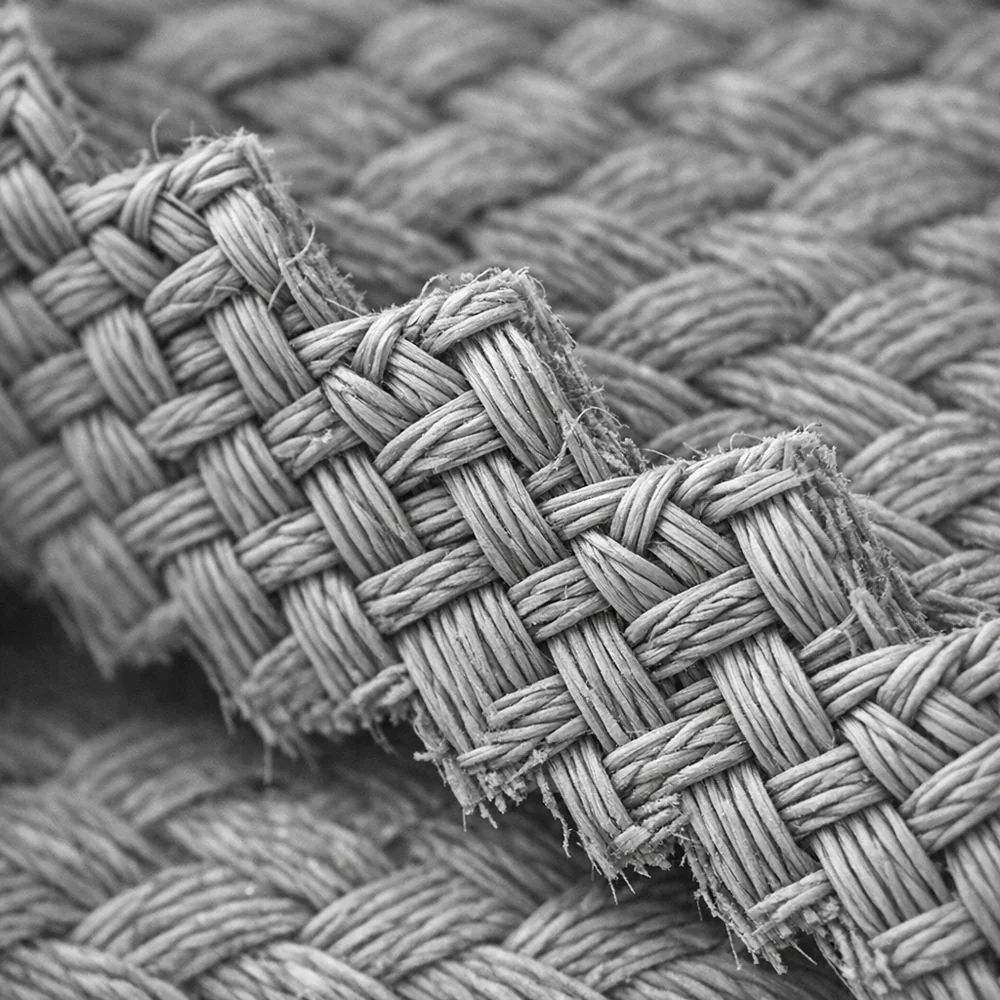
When you cut fabric, the threads at the cut edge gradually work loose and unravel. This is especially noticeable on loosely woven materials or internal seams that experience a lot of movement. Pinking shears, which cut a zigzag edge instead of a straight line, are one of the simplest ways to prevent this.
The zigzag pattern shortens the individual thread lengths at the cut edge.
Instead of long threads that can easily pull free, you get many short segments that don’t have enough length to unravel from the main weave. This works particularly well on tightly woven cottons.
For loosely woven fabrics or high-wear areas, combine pinking with a line of straight stitching near the edge. The stitching locks threads in place while the pinked edge reduces shedding. Liquid fray preventers are another option for small areas, though they can create a noticeable texture change. For the ultimate protection, serging wraps the edge in thread, but that requires specialized equipment.
Key Insight: Pinking shears prevent fraying by creating short, diagonal thread ends that cannot unravel as easily as straight-cut edges.
Replacing Elastic in Waistbands
Elastic loses its stretch over time, especially with heat exposure and repeated washing. Pajama pants, underwear, and athletic wear eventually end up with saggy waistbands, but replacing the elastic is a cheap and easy fix that brings them back to life.
Most waistbands use either cased elastic (threaded through a fabric tunnel) or elastic sewn directly to the fabric.
Cased elastic is the easier repair. Find the seam opening in the casing, or make a small cut on the inside if there isn’t one. Attach a safety pin to the end of new elastic and thread it through the entire circumference. When it emerges, overlap the ends by about an inch and stitch them together with a zigzag stitch. Push the joined section into the casing and close the opening with hand stitches.
For elastic sewn directly to fabric, you’ll need to remove the old stitching first. Pin the new elastic in place, stretching it slightly as you sew with a stretch stitch or narrow zigzag. When choosing replacement elastic, match the original width and consider the type: braided elastic narrows when stretched and works best for casings, while woven elastic maintains its width and sews more smoothly to fabric.
Key Insight: Use braided elastic for casings (it narrows when stretched), but choose woven elastic for sewing directly to fabric (it retains its width).
Dye Refresh for Faded Blacks
Black clothes fade over time from UV exposure, washing, and simple wear. That grayish or brownish cast makes items look tired and worn even when the fabric is still in great shape. Re-dyeing can bring back the original depth of color.
The key is matching your dye to your fabric type.
Cotton and linen work with fiber-reactive dyes that form chemical bonds with the cellulose fibers. Polyester requires disperse dyes and much higher temperatures, close to boiling. Check care labels to know what you’re working with before you start.
Start by washing the garment with a color remover to strip out any residual chemicals. The fabric should be clean and slightly damp when you add it to the dye bath. For cotton, add salt to help the color bond to the fibers. Stir constantly to prevent uneven color where the fabric bunches up.
Longer submersion times and stable temperatures give you deeper, more saturated color. After dyeing, rinse multiple times in cold water to remove excess dye and prevent it from transferring in future washes.
Key Insight: Natural fibers like cotton need reactive dyes, while synthetics like polyester require high-heat disperse dyes.
Waterproofing Reapplication

Technical outerwear like rain jackets and ski shells rely on specialized durable water repellent (DWR) coatings that cause water to bead up and roll off instead of soaking in. These coatings wear down over time from abrasion and body oil contamination. When you notice water soaking into fabric that used to repel it, it’s time for a refresh.
Before applying new waterproofing, clean the garment thoroughly with a residue-free detergent.
Regular detergents can leave films that block waterproofing chemicals from bonding. After washing, run the garment through the dryer on medium heat, which can reactivate any residual DWR that’s still present.
Waterproofing treatments come in spray-on and wash-in formulas. Spray-on lets you target high-wear areas like shoulders and elbows while preserving breathability elsewhere. Wash-in provides more even coverage but may slightly reduce moisture vapor transmission. Newer formulations use wax-based chemistries rather than persistent fluoropolymers, which is better for the environment.
After treatment, run the garment through the dryer again on medium heat to activate the new coating. Test effectiveness by sprinkling water on the surface, looking for it to bead and roll off rather than soak in.
Key Insight: Use spray-on treatments for targeted protection that preserves breathability, and wash-in treatments for uniform coverage on fully waterproof items.
Conclusion
Learning to mend clothes connects you to practical wisdom that generations of people took for granted. Every small repair saves money and keeps something you already like out of the landfill. The techniques here require nothing more than patience and a willingness to learn.
A button reattached properly will outlast the original. Jeans patched with sashiko become more interesting than they were before the damage. A darned sweater continues to provide warmth for years. Each fix represents a decision to value what you already own rather than constantly replacing it.
The tools are simple and cheap. What matters is making the choice to repair rather than replace.
References
-
Cornell University Fiber Science Program. “Textile Fiber Properties and Identification.” Cornell Cooperative Extension, Cornell University.
-
The Textile Research Journal. Various publications on dye uptake and fabric treatment. SAGE Publications.
-
ResearchGate. “Effectiveness of Conservation Stitching Techniques for Textile Repair.” Various textile conservation studies.
-
PieceWork Magazine. “The History and Practice of Darning.” Interweave Press.
-
American Chemical Society. “Environmental Considerations in Durable Water Repellent Chemistry.” ACS Publications.
-
University of Minnesota Extension. “Clothing Repair and Maintenance.” Extension publications on textile care.