Cleaning Grout and Tile Naturally: Porosity and Oxidative Hygiene
Table of Contents
Things You'll Learn From This Article:
- Tiles and grout clean differently because grout is porous and soaks up dirt and moisture, while tiles usually don’t.
- Knowing whether your grout is cement-based or epoxy changes what cleaners are safe to use.
- Cement grout and acids don’t mix; using vinegar regularly will slowly eat away your grout.
- Oxygen bleach works by bubbling stains out of grout pores, but only if you let it sit long enough.
- Scrubbing works best after a cleaner has softened the dirt, not on dry grout.
- Steam cleaning reaches places brushes and liquids can’t, but only helps if you dry the grout right away.
- The brush matters: stiff nylon bristles reach into grout lines better than sponges or mops.
- Sealing grout after deep cleaning stops water and stains from soaking back in.
- Grout must be completely dry before sealing, or the sealer won’t work properly.
- A quick squeegee after showers dramatically cuts down mold and mildew growth.
- Letting water sit in grout lines is what allows most bathroom problems to start.
- Soap scum isn’t just dirt—it feeds bacteria and dulls tile if you don’t remove it regularly.
- Alkaline cleaners like baking soda or borax break down soap scum better than acids.
- Old, permanently stained grout can be covered with grout colorants instead of being replaced.
- Grout colorants seal the surface completely, making future cleaning much easier.
- Small daily habits reduce the need for harsh cleaners and heavy scrubbing later.
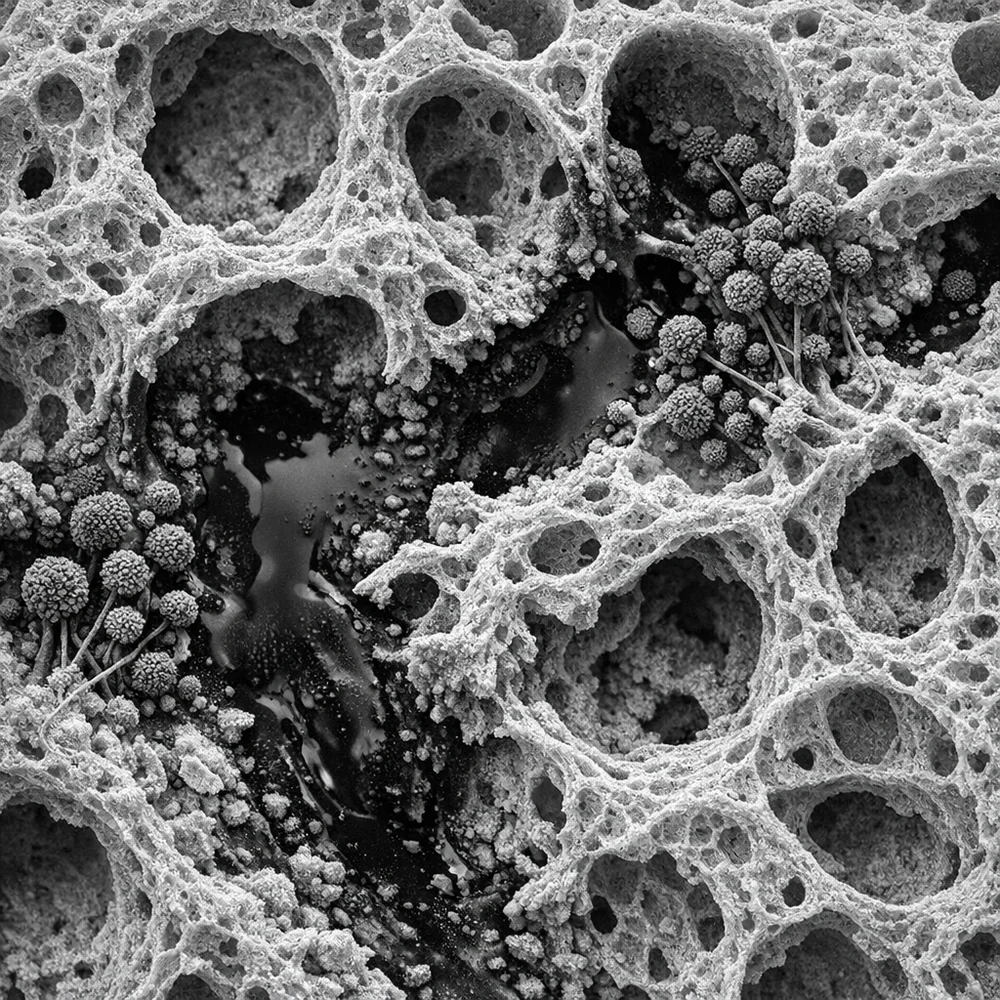
Tiled surfaces look deceivingly simple to clean, but there’s a hidden complexity most people miss. While the tiles themselves are usually non-porous ceramic or porcelain that wipe clean easily, the grout between them is a completely different material. Standard grout is cement-based, and cement is basically a sponge at the microscopic level. Every time moisture hits that grout, it soaks in and brings contaminants along for the ride.
Over time, these contaminants build up in the tiny pores and create stubborn biofilms that regular wiping can’t touch.
Traditional cleaning approaches often resort to harsh acids or chlorine bleach, but these can weaken grout structure or damage tile finishes. What you need is a smarter approach that uses the right chemistry for the job. This guide covers natural methods that actually work, from oxygen bleach to steam cleaning. We’ll also explain why vinegar, despite its reputation as a natural cleaner, can actually destroy your grout over time.
First Things First: Know Your Grout Type
Before you start any cleaning protocol, you need to identify what kind of grout you’re working with. This single factor determines what chemicals are safe to use and how aggressive you can get with cleaning. The most common type is cementitious grout, made from Portland cement and sand. It’s porous, absorbent, and extremely sensitive to acids.
Cementitious grout is essentially a living mineral matrix, which means acids will literally dissolve it.
The other type is epoxy grout, a synthetic material made from resins and silica filler. Epoxy is virtually non-porous and chemically resistant to almost everything you’d find in a typical household. It doesn’t absorb water and rarely hosts bacterial colonies. You can usually identify epoxy grout by its slightly plastic or glossy appearance compared to the matte look of cement grout. That said, epoxy still accumulates surface films of soap scum and grease that need regular cleaning.
Key Insight: Cementitious grout is a highly porous mineral matrix sensitive to acid dissolution, while epoxy grout is a non-porous synthetic resin with high chemical resistance. Identifying the grout type is the primary prerequisite for selecting an effective and safe cleaning protocol.
Deep Cleaning with Oxygen Bleach
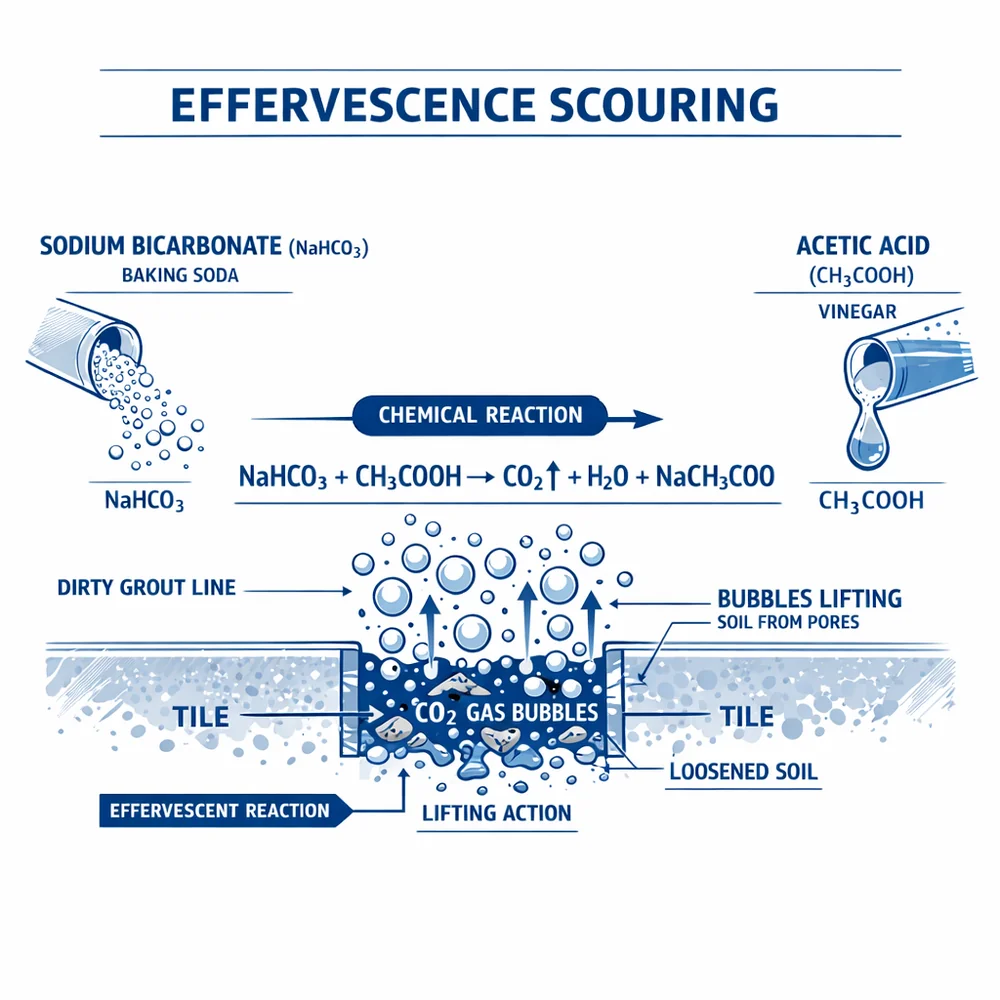
Now that you know your grout type, let’s talk about the best natural cleaner for deep cleaning cementitious grout. Sodium percarbonate, commonly called oxygen bleach, is incredibly effective without the harsh effects of chlorine bleach. When you dissolve it in warm water, it breaks down into sodium carbonate and hydrogen peroxide.
The hydrogen peroxide releases oxygen that physically pushes stains out of the grout pores as it bubbles.
This oxidative process works particularly well on pigments and organic stains that have soaked deep into the cement. To use it properly, mix a concentrated paste and apply it directly to the grout lines. Here’s the crucial part: let it sit for at least thirty minutes. The chemical reaction isn’t instantaneous, and rushing this step means you won’t get the deep cleaning effect. After the dwell time, scrub with a stiff brush and rinse thoroughly with clean water. Follow up with a mild vinegar rinse to neutralize any remaining alkalinity.
Key Insight: Sodium percarbonate (oxygen bleach) utilizes oxidative chemistry to physically lift and chemically break down organic stains within the grout’s pore network. This effervescent reaction provides deep-pore sanitization without the fiber-degrading risks of chlorine bleach.
Steam Cleaning: Zero Chemicals, Maximum Power
If oxygen bleach tackles stains chemically, steam cleaning attacks them with pure thermal energy. A steam cleaner works by pressurizing water and releasing it through a nozzle at temperatures that instantly transfer massive heat energy to whatever they touch. When steam contacts cold grout, it liquefies oils and denatures bacterial proteins on contact.
Steam has a unique advantage because it’s a gas with zero surface tension. Unlike liquid cleaners that sit on top of surfaces, steam penetrates into the smallest microscopic fissures. Once inside, it expands and dislodges soil from places a brush could never reach.
Apply the steam in slow, consistent passes over the grout lines.
Your goal is to raise the surface temperature above 70 degrees Celsius, which is the threshold for killing most household pathogens and mold spores. The critical step most people skip: dry the grout immediately with a clean microfiber cloth. If you let the steam moisture sit, it just re-deposits the loosened dirt right back into the pores. Steam cleaning is the gold standard for chemical-free grout restoration when done with proper attention to the drying phase.
Key Insight: Pressurized steam utilizes high thermal energy and zero surface tension to penetrate deep into grout pores. This liquefies organic fats and denatures microbial proteins, providing a clinical level of hygiene through thermodynamic disruption rather than chemical reaction.
Why Vinegar Will Ruin Your Grout

Speaking of what not to use, let’s address the elephant in the room. White vinegar is often promoted as the ultimate natural cleaner, and it’s great for many surfaces. But on cementitious grout, it’s actually destructive. The acetic acid in vinegar reacts with the calcium silicate hydrates that hold cement together. Essentially, you’re dissolving the glue.
Repeated exposure to acids causes grout lines to recede and sink between tiles over time.
This weakens the bond of the entire floor and creates deeper channels where even more dirt can accumulate. If the grout is already old or damaged, an acid-based cleaner accelerates total failure. This is the same reason natural stone surfaces need pH-neutral cleaners. Any mineral-based material with high carbonate content is vulnerable to acid dissolution. If you absolutely must use vinegar for a localized mineral problem, neutralize the area immediately afterward with baking soda. But for routine cleaning, keep acids away from cement grout entirely.
Key Insight: Acetic and citric acids react with the cementitious binder in grout, leading to structural erosion and “recessing” of the joints. Protecting the mineral matrix requires a shift to pH-neutral or oxidative cleaning agents for all routine tasks.
The Right Scrubbing Technique
Chemistry and steam provide the cleaning power, but mechanical scrubbing is still essential for dislodging stubborn soil. Here’s the problem with using sponges or flat mops on grout: the grout lines are recessed below the tile surface, so those tools just glide right over them. You need a specialized brush with stiff, narrow bristles that can actually reach down into the channel.
When you scrub, use a circular motion to transfer energy to the dirt from all angles.
Consistent downward pressure matters more than speed. Press the bristles into the joint to reach the full depth of the pore structure. Synthetic nylon bristles are generally more durable and provide more consistent action than natural fibers. Never use metal brushes on grout, as they’ll gouge the cement and create new damage. Always scrub after a chemical agent has had time to work. Scrubbing dry grout is inefficient and can cause unnecessary abrasion. When you combine mechanical force with chemical softening, you get far better results than either approach alone.
Key Insight: Stiff-bristled brushes provide the mechanical down-pressure necessary to reach recessed grout joints. Circular agitation patterns ensure that kinetic energy is transferred to the soil from all angles, maximizing the physical displacement of stubborn surface contaminants.
Sealing: Lock In Your Results
After all that scrubbing and rinsing, your grout is now cleaner than it’s been in ages. But there’s a catch: you’ve also stripped away any old protective layer, leaving the pores wide open to immediate re-staining. To lock in your results and prevent future contamination, you need to apply a sealer.
Wait at least 48 hours after cleaning before sealing. The grout must be completely dry or the sealer won’t bond properly.
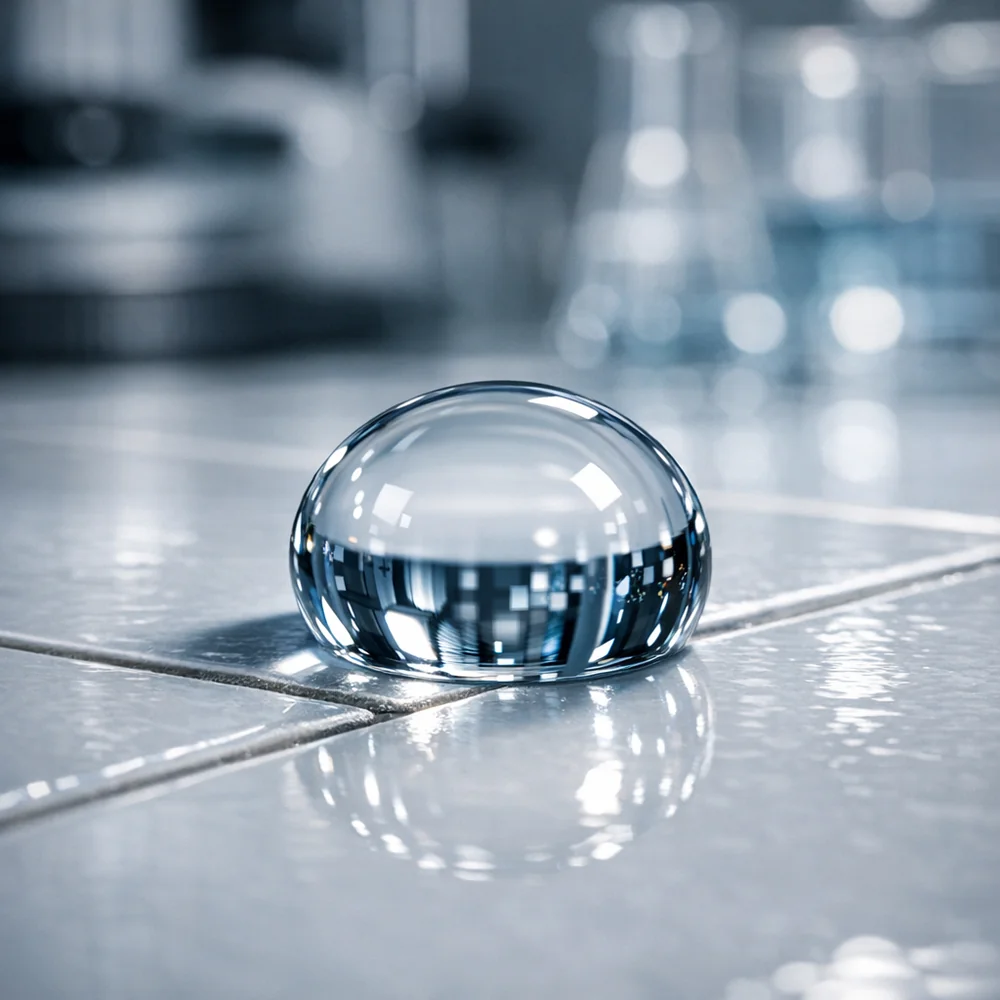
Impregnating sealers fill the pores with a transparent resin that repels water and oils. Apply the sealer specifically to the grout lines, not the tile surface. If sealer gets on the tiles, buff it off immediately. A properly sealed grout line acts almost like a non-stick surface. Instead of soaking into the pores, spills bead up on top for easy removal. This dramatically extends the time between deep-cleaning sessions and keeps your bathroom or kitchen looking fresh with minimal maintenance.
Key Insight: Deep cleaning leaves grout pores open and highly vulnerable to new contamination. Applying an impregnating sealer after a forty-eight-hour drying period manages the joint’s surface energy, preventing further absorption of lipids and pigments.
Daily Maintenance: Squeegee and Rinse
With sealing covered, let’s talk about the daily habits that prevent problems before they start. In wet environments like showers, moisture is your biggest enemy. Mildew and mold need persistent dampness to thrive, so cutting down the time surfaces stay wet is the most effective prevention strategy you have.
A simple rubber squeegee used after every shower reduces the moisture load by about 90 percent.
This mechanical step takes thirty seconds and prevents water from sitting in recessed grout lines where it would otherwise stagnate. Rinsing the walls with clean water to remove shampoo residue helps prevent pink mold, Serratia marcescens, which we also discuss in our shower curtains article. For tiled floors, frequent dust-mopping with a microfiber mop prevents grit buildup. When wet-mopping, use a two-bucket system so you’re not just spreading dirty water into the pores. These small daily actions eliminate the need for aggressive chemical interventions down the road.
Key Insight: Moisture management through squeegeeing and rinsing is the most important daily step for grout preservation. Eliminating standing water and soap residues suppresses the growth of fungal biofilms and prevents the accumulation of mineral scale.
Grout Colorants: Restoring Permanently Stained Joints
For older grout with stains that oxygen bleach can’t remove, there’s one more option before you resort to regrouting. Sometimes the stain isn’t just discoloration but actual loss of mineral material. In these cases, grout colorants can restore the uniform look and simultaneously act as a total sealer.
These products are essentially high-solids epoxy coatings that paint over the existing grout.
A grout colorant forms a continuous plastic film over the joint, completely eliminating underlying porosity. This makes the grout virtually waterproof and incredibly easy to clean going forward. Application requires precision to avoid coating the tile edges, so work slowly with a small brush. Before applying any colorant, the grout must be cleaned to surgical perfection using oxygen bleach. Any grease left behind will prevent proper bonding. Colorant restoration is a multi-stage process, but it can reset the lifespan of a tiled installation that’s been neglected for years.
Key Insight: Grout colorants and whitener coatings provide a non-porous, restorative layer for aged or permanently stained joints. This intervention requires clinical-level pre-cleaning to ensure a lifelong bond and acts as a total seal against future contamination.
Tackling Soap Scum on Tiles
While we’ve focused mostly on grout, the tiles themselves need attention too, especially when soap scum builds up. Soap scum is a mineral-lipid matrix that forms when fatty acids in soap react with calcium ions in hard water. It bonds tightly to surfaces and creates a hazy film that dulls the shine.
High-pH cleaners like borax work well here because they saponify the lipids, essentially turning the scum back into a soluble soap.
Combining alkalinity with mild abrasion provides a synergistic effect for restoring tile luster. Baking soda provides the mechanical energy while the high pH manages the chemical dissolution. Consistency in removing soap scum is important because this residue becomes the nutrient source for bacterial and fungal growth. In showers, the scum feeds the same organisms you’re trying to eliminate from the grout. Reference our soap scum and hard water guide for more detailed protocols.
Key Insight: Highly alkaline cleaners saponify the lipid component of soap scum, facilitating its chemical dissolution and removal. Managing the pH of the cleaning agent ensures the effective disruption of the mineral-lipid matrix without the need for abrasive force that can damage tile glazes.
Conclusion
Cleaning grout and tile effectively comes down to understanding materials. Cementitious grout is porous and acid-sensitive, so oxygen bleach and steam are your best friends while vinegar is your enemy. Epoxy grout is far more forgiving but still needs regular surface cleaning. Whatever your grout type, the scrubbing technique matters: use stiff-bristled brushes in circular motions after your chemical agent has had time to work.
After deep cleaning, seal your grout within 48 hours to lock in the results and prevent immediate re-staining. Daily habits like squeegeeing after showers and rinsing away soap residue prevent most problems before they start. For permanently stained grout, colorants offer a restoration path that’s cheaper than regrouting and creates a waterproof barrier for the future.
Treat your tiled surfaces as the technical systems they are, with cement chemistry and moisture dynamics that respond to specific inputs. Get the chemistry right, and you’ll spend far less time scrubbing while enjoying results that actually last.
References
- Cooper, R. A., et al.
(2010). “The Microbiology of Tiled Surfaces: Biofilm Formation and Suppression in High-Moisture Environments.” Journal of Applied Microbiology. 2.
International Fabric Institute. (2014). “Mineral Integrity and Cleaning Chemistry: The Science of Grout Erosion.” IFI Technical Bulletin.
- 1-12. 3.
Smith, J. G., et al. (2012).
“Oxidative Stain Removal in Porous Mineral Matrices: A Study on Sodium Percarbonate.” Journal of Building Engineering. 4. World Health Organization (WHO).
(2019). “Best Practices for Environmental Hygiene: Managing Fungal Spores in Domestic Wet Zones.” WHO Technical Guidance. 5.
U.S. Environmental Protection Agency (EPA). (2020). “Chemical Resistance and Sealing of Cementitious Materials: A Guide for Homeowners.” EPA Technical Bulletin.